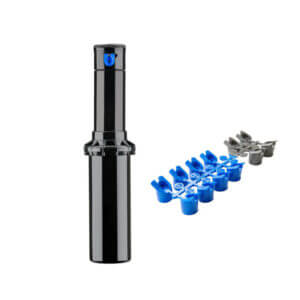
Hunter PGP Ultra Sprinklers
Hunter PGP Ultra Sprinklers
The Industry-Leading Rotor: Achieve Unrivalled Performance with the Hunter PGP Ultra Sprinkler
For decades, the Hunter PGP rotor has stood as the benchmark for reliability and performance in landscape irrigation.
The PGP Ultra takes this legacy to the next level, incorporating over three decades of research, customer feedback, and rigorous testing to deliver a rotor that’s simply the best in its class. Whether you’re a homeowner looking for a dependable sprinkler or a professional requiring top-tier performance, the Hunter PGP Ultra is the ultimate choice for efficient and effective watering.
Unmatched Features and Benefits:
- Patented Automatic Arc Return: Protect your investment from vandalism. If the turret is turned, it automatically returns to its original arc setting, ensuring consistent coverage and preventing water waste.
- Optional Drain Check Valve: Prevent low-head drainage and water waste in systems with elevation changes (up to 10 feet with factory-installed valve).
Hunter PGP Ultra Sprinkler SPECIFICATIONS:
- Overall, Height: 19 cm
- Pop-up Height: 10 cm
- Exposed Diameter: 4.5 cm
- Inlet Size: ¾” BSP (Measuring 26.44mm)
- Radius: 8.8 to 14 m
- Flow rate: 0.07 to 3.23 m3/hr; 1.2 to 53.7 l/min
- Recommended pressure range: 1.7 to 4.5 bar; 170 to 450 kPa
- Operating pressure range: 1.4 to 7 bar; 140 to 700 kPa
- Precipitation rates: 10 mm/hr approx.
- Nozzle trajectory: Std = 25 degrees, Low angle = 13 degrees
Hunter PGP Ultra Adjustment Instructions
1. Arc Adjustment (Spray Angle)
The arc determines how far the sprinkler head turns (e.g., 90° quarter-circle, 180° half-circle, 360°
full circle).
• To Increase Arc: Insert Hunter adjustment tool (or small flat screwdriver) into the arc adjustment
slot on top. Turn clockwise (up to 360°).
• To Decrease Arc: Turn counter-clockwise (minimum 50°).
Tip: Always start with the left-hand stop fixed before setting arc.
2. Radius Adjustment (Spray Distance)
Insert the adjustment tool into the radius adjustment screw above the nozzle. This screw also acts
as the nozzle retaining screw, holding the nozzle securely in place.
• Turn clockwise to decrease distance (the screw lowers into the water stream).
• Turn counter-clockwise to increase distance (up to full nozzle radius).
Note: The radius is also determined by the nozzle size you use, your water flow and pressure.
Additionally, tipping the spray at the nozzle can be done with any nozzle to fine-tune the distance.
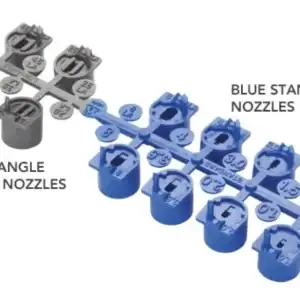
3. Nozzle Installation or Change
1. Use tool to pull riser stem up and hold in place.
2. Remove existing nozzle (if fitted).
3. Insert desired nozzle firmly into nozzle socket.
4. Tighten the radius adjustment screw (nozzle retaining screw) slightly to lock nozzle.
4. Flushing Before Setup
Before installing a nozzle, briefly turn system on to flush debris. This prevents clogging
Hunter Industries was built around the innovation of the PGP rotor. This video is an overview of Hunter residential and light commercial rotors. Learn the difference between Hunter ¾” inlet rotors and their advanced features.